February 13, 2016
I’ve always had a “thing” for the old West German made SIG P226s. When I first saw one many years ago, I just had to have one and as most know, they have never come cheap. I sold off a few to get my prize. I still have that gun and would never consider selling it.
For some reason, the old stamped slide German models just shoot better than the newer US made guns. I have no evidence to prove one way or another, but I’m apparently not the only one who feels this way.
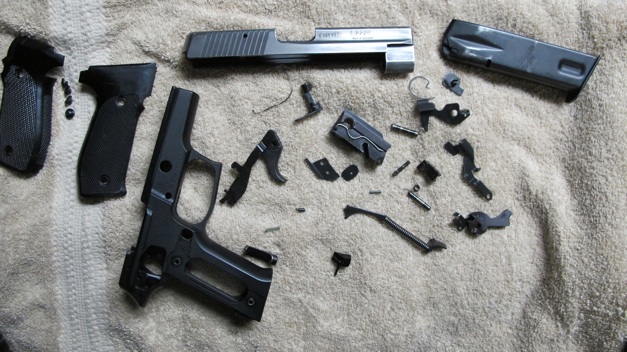
Recently while browsing Gunbroker for something else, I ran across an old German P226 project gun. Slide disassembled and frame together. Apparently the owner was going to have the slide refinished, but never got to it. Here are the parts I received.
I cannot imagine what happened to the slide. It looks as if it came in contact with some kind of chemical to mess the finish up. Certainly not rust. All the parts seem to be here and the frame function tests.
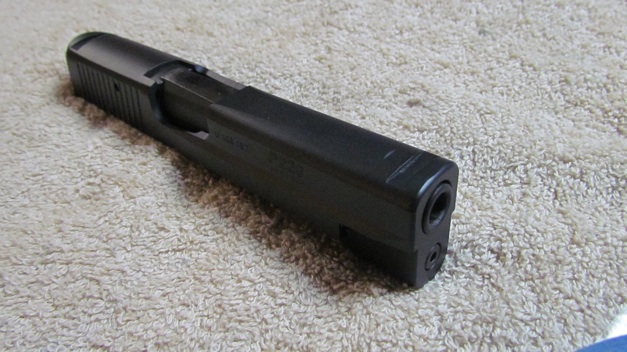
Thankfully the barrel is excellent as advertised in the auction, so this will be an easy restore.
I haven’t decided on how I’m going to refinish this piece yet, but I feel the need to sand and polish the slide as I can feel little lines where the finish is missing. Meanwhile, I’ll be ordering new springs, probably grips and new sights. I’ll get the frame torn down as well and inspected.
February 14, 2016
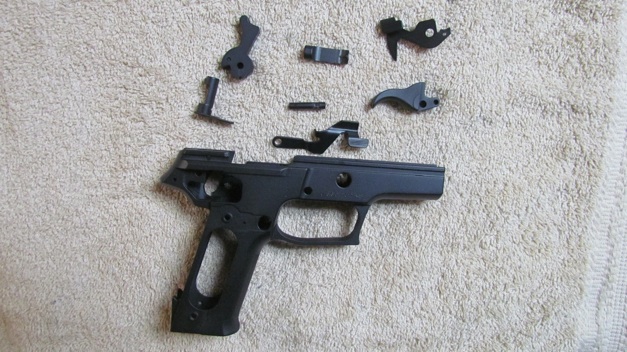
The frame is now striped and inspected. No cracks or any type of excessive wear on either the frame or parts. Frame is pretty much pristine except for some missing finish on the front strap. Lots and lots of parts in a SIG as you can see.
As I indicated earlier, I sanded down the slide and found a couple of spots I had to file. Working from 320 up through 800, the slide should be ready to sand blast for Cerakoting.
Too cold for the garage and sandblasting at the moment, so in the mean time, I’ll get new springs, sights and probably grips ordered.
February 15, 2016
Finally warmed up enough (if you can call 32 warm) to get in the garage and catch up on some Cerakoting. In between painting I got the slide and breech block sandblasted.
I only blasted the exposed ends of the breech block to clean it up some. Sig used some type of a bonded coating on these things. Similar to the coating used by Glock, S&W, Sig and others on their slides now days. Very hard.
Not sure if I’m going to Cerakote the exposed parts or leave them shiny. Blasting sure did clean up the breech face though (I do plug up the firing pin hole front and back while blasting). If I do paint it, I’ll just do the exposed ends. The fit to the slide is so tight, I would have to sand the finish off anyway to get it back in.
Here you can see how course the slide looks after blasting. This will make a very good surface for the Cerakote to adhere to.
February 16, 2016
Decided to revisit the barrel this evening. Ran a brush and a jag through the bore and it is spotless. I did notice the same finish issues on the crown as I saw on the slide. I’m starting to think it was a victim of the Pepsi Syndrome. Can’t image what else might do it. I did notice some light rust on the barrel hood.
Some 600 grit wet/dry sandpaper on a block took care of most of it. Finished it up with some Metal-Glo while watching TV.
Still some tiny pitting if you look real close, but I’m not going to lose any sleep over it. Parts should be arriving starting tomorrow, so maybe I can move farther along.
February 17, 2016
Ok, a little progress today. Had hoped to do a bit more, but got caught up in other things.
Barrel and guide rod blasted. You can see in the photo the rubber stoppers I use to protect the inside of the barrel.
Here is the barrel plugged up, taped and racked for painting.
The pieces of the slide test fitted together. Waiting on a firing pin spring before I reassemble the breech block.
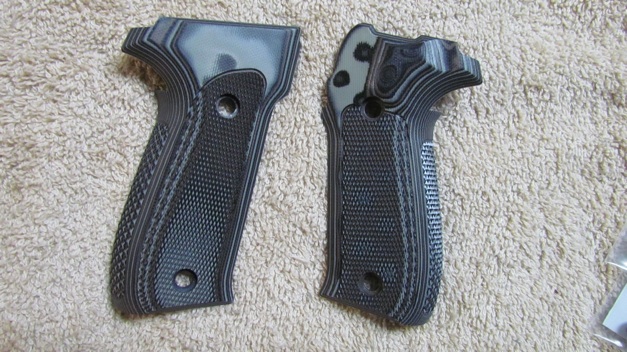
Here are the goodies the postman delivered today. P226 parts kit, short reset trigger kit, stainless and black hex head grip screws and some Hogue extreme G10 checkered grips.
The grips really didn’t turn out looking like I thought they would. At this point I think I’m going with a black frame (boring) or possibly a flat dark earth frame. Thankfully I got checkered and not their Piranha grips. Tried Hogue’s Piranahas before and after a couple of mags you knew something had chewed your ass up.
February 18, 2016
Today turned out to be a bit of a disappointment. Finally decided to restore the Sig to is previous all black glory and then made a mess of things.
Here the parts are racked and ready to be cleaned and degreased. They don’t look bright and shinny yet because of the blast media I use. Rather than spend a small fortune for aluminum oxide, I use a coal based blast media. Its a fraction of the cost and works just as well although it is a bit dirty. The government says they don’t want us to burn the shit, so I might as well blast with it. Anyway it just adds one small step to clean before degreasing. I didn’t used to to do it, but I’m finding it lets my bucket of Acetone last much longer and it is expensive too.
Parts out of the oven. Everything look great but the frame. Next picture you’ll see where I screwed up.
My dumb ass self was wearing a long sleeve shirt with the cuffs unbuttoned. Cuff caught the frame as I was hanging it. Tried to burn the marks out with more paint which is why it has an orange peel look. Cerakote is a thankless bitch that gives you no quarter for a mistake. Re-blast and paint again tomorrow. Arrg!
February 19, 2016
In between business appointments today, I was able to re-blast, degrease and paint the frame.
I can now start fitting the frame back together. Still waiting on a firing pin spring and sights to completely finish.
February 21, 2016
New springs in hand and a bunch of coffee, I set about completing the project sans the sights which hopefully will arrive this week.
Lots of parts. Reassembling a Sig makes you wish every gun was a Glock. With the frame complete, off to finish the slide.
Here is the installation of the ultra exotic Sig double roll pin. Sig says every time this pin is removed, it needs to be replaced with new pins. I really think you could just unwind the old pins by rolling them between a couple of pieces of flat steel. Anyway the procedure is to drive the large pin in about half way with the split at the 12 o’clock position. Then drive the smaller pin in flush with the large pin with the split at 6 o’clock, then drive the whole mess home. This is a bitch to do and I would not recommend doing it very often. The whole time I was singing to myself “John Henry was a steel driving man, lord, lord...”
Almost at the end of the rainbow. Performed all the function tests and the short trigger reset I installed works great. All that is left are the sights and a range day. I was on the fence the whole time about the color, but I’m glad I stayed with the classic black for a classic gun.
March 2, 2016 - Finished
New Meprolights installed and ready for the range. Can’t wait!